The most energy efficient way of installing our infrared heating panels is on walls or on the ceiling combined with a thermostat. However, the panels may also be used as stand heating together with our special aluminium feet.
 redsun infrared panel heater 4 step installation
step 1: drill 4 holes in any wall or ceiling.
step 2: put a screw in each of the 4 holes
step 3: mount the redsun infrared panel heater
step 4: plug in cable and optionally connect a thermostat
Each panel may be installed vertically or horizontally by drilling only 4 holes in the ceiling or on the wall. An assembly help as well as screws and pins come with each panel. Plug in the power supply cable and the panel starts to work immediately. In order to regulate temperature and your heating costs even better we suggest the use of a thermostat.
-
Inside walls and ceilings are ideal for the installation of Redsun infrared heating panels. Through the application on an inside wall or ceiling, colder outside walls are heated up, which enables an optimal room climate. However, the mounting of the panels on an outside wall is as well possible and will create a similar room climate.
Make sure that the infrared waves are not blocked by any obstacles in the way – keep in mind the principle the sun: sunny areas are warmer than areas in the shadow.
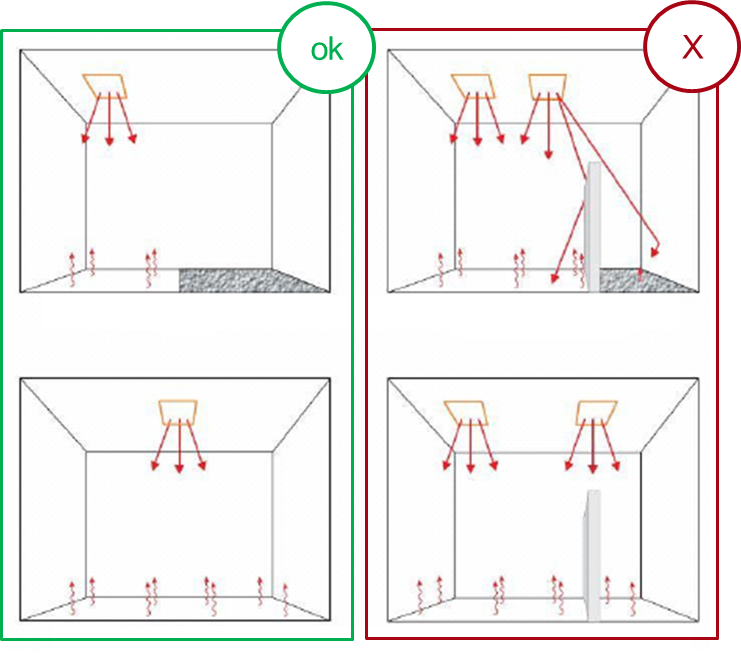
Infrared heating panels may also be applied to heat up only specific areas within a room, office or shop. For purpose this lower panels with lower Watt power are necessary, which additionally helps to save energy.


.jpg)


 Facebook
 Twitter
 linkedin